Getting started with Alias
If this is your first time in Alias, the easiest way to get comfortable is to do one full pass: sign up, confirm where mail should land, create one alias, and send yourself a quick test message.
A good first habit
Use a fresh alias whenever you sign up for something new. If that address ever starts getting noisy, you can switch it off without touching your real inbox.
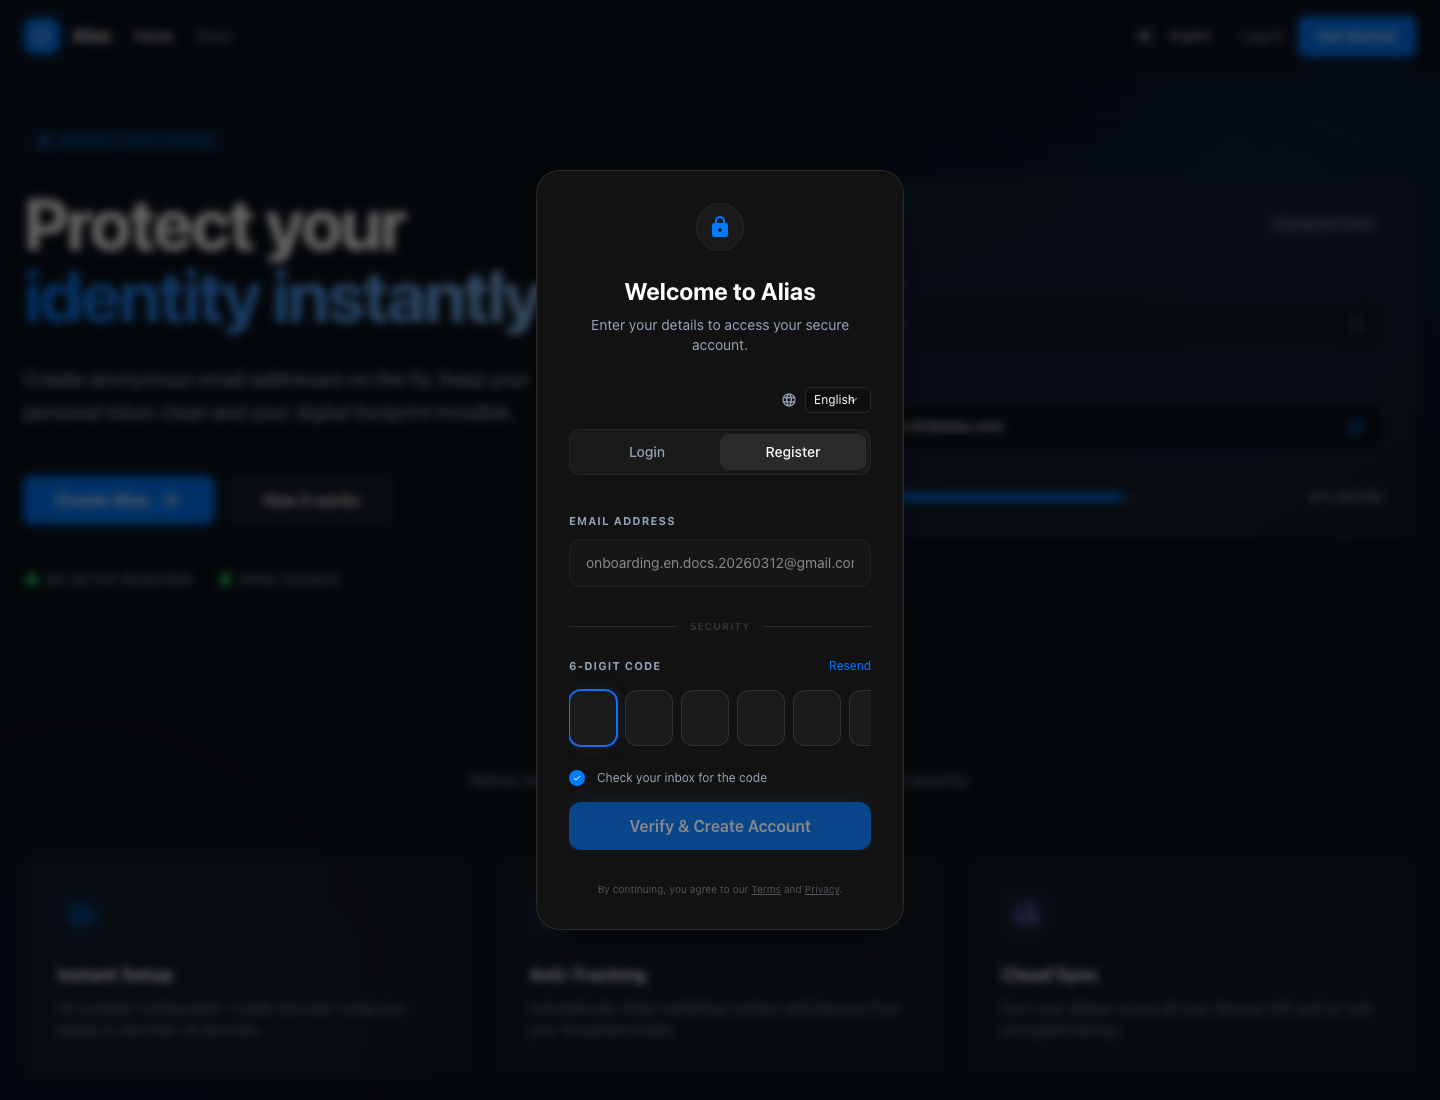
1. Sign up with an inbox you already use
Open the landing page, switch to Register, and enter an email address you can access right away. Alias sends a 6-digit code to that inbox, and once you confirm it, your account is created and the dashboard opens automatically.
2. Take a quick look around the dashboard
The dashboard gives you the short path forward: create an alias, add another destination, or move into custom domains later. You do not need to configure everything up front.
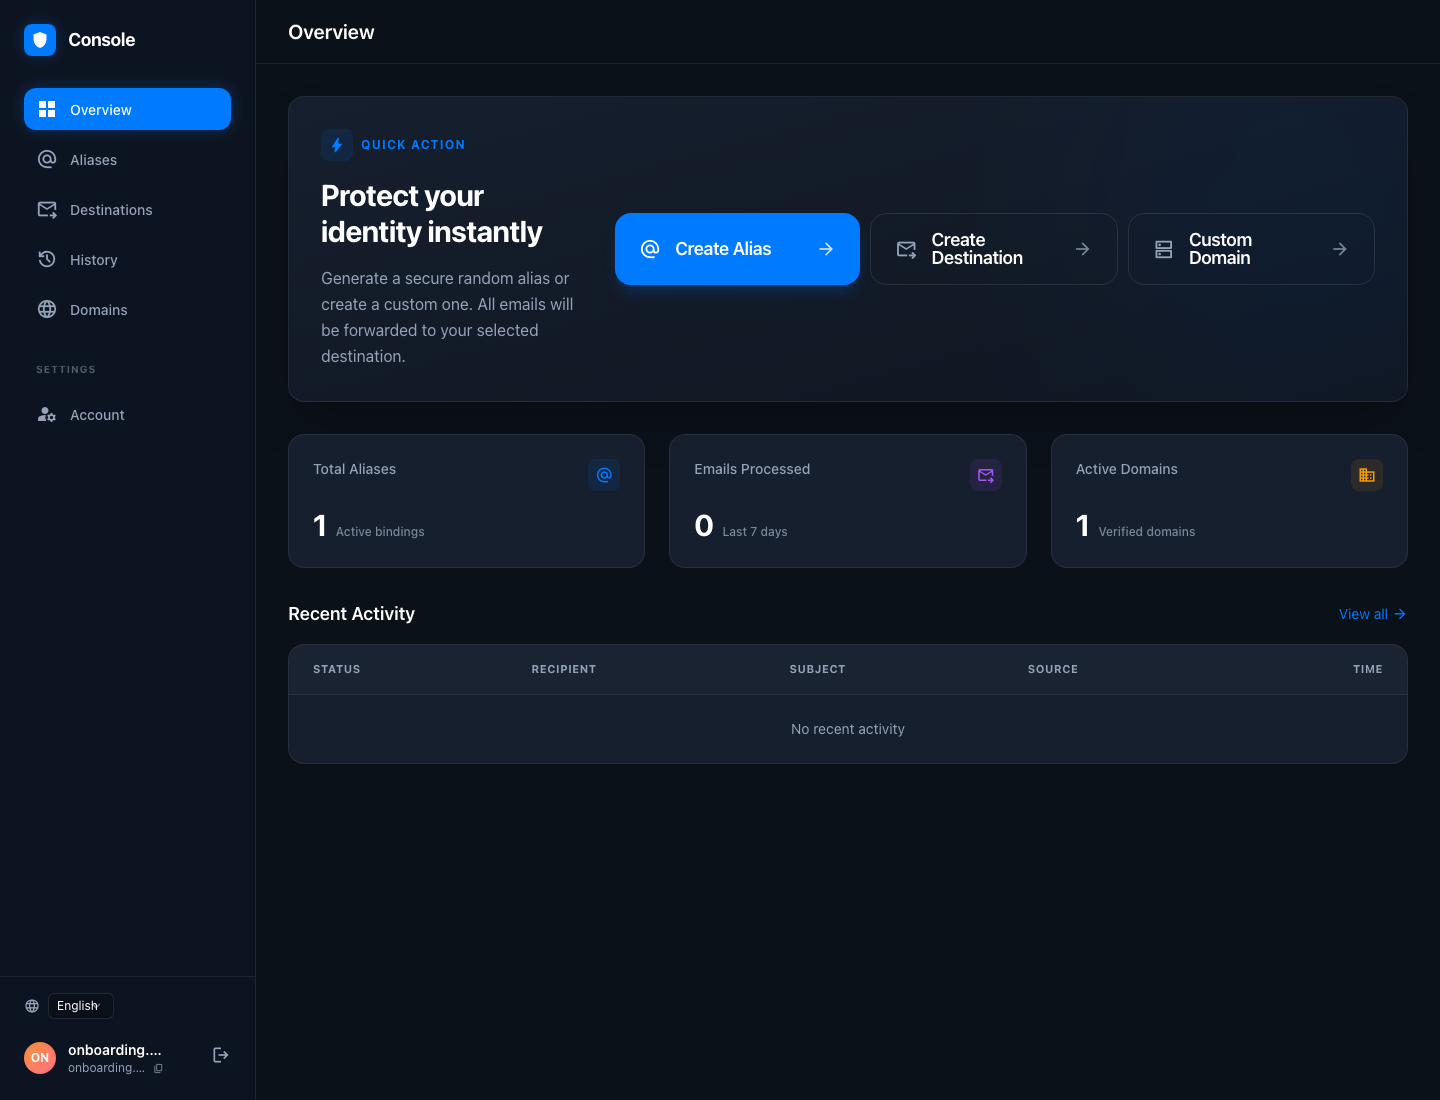
Fast path
The email you used to sign up is already available as a destination. If that is the inbox you want to use, you can jump straight to alias creation.
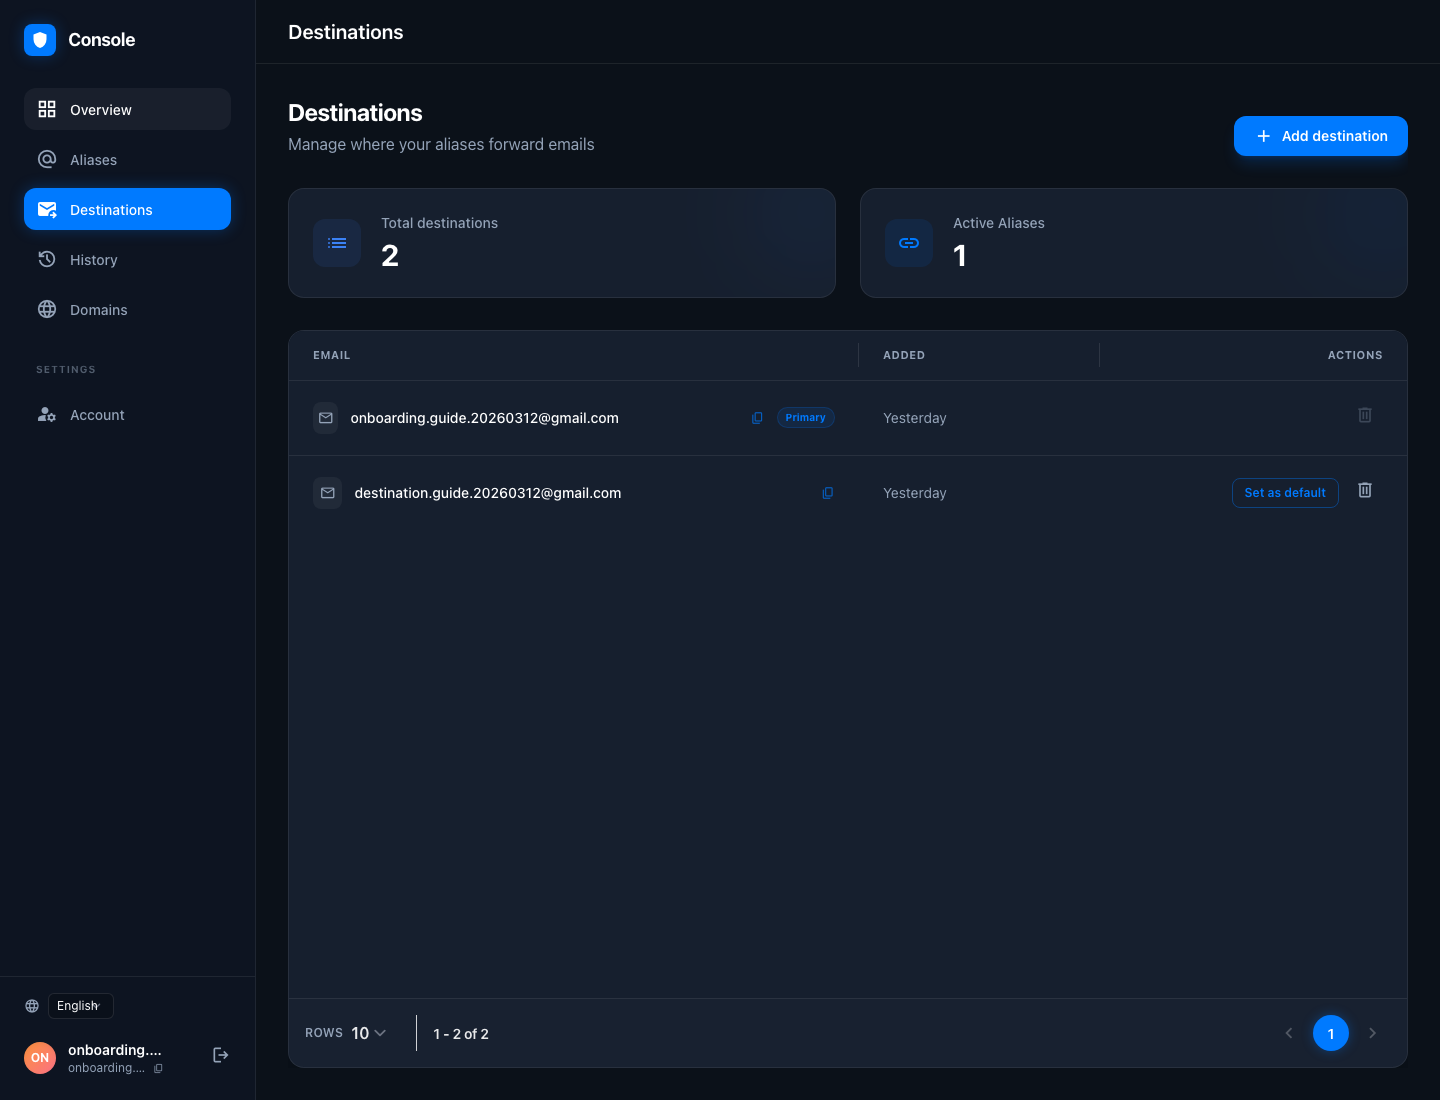
3. Add another destination when you need one
If you want forwarded mail to land somewhere else, add that inbox now.
Open Create Destination or go to Destinations, enter the mailbox you want to use, and confirm it with another 6-digit code. Once it shows up in the list, you can keep it as a secondary destination or make it the default later.
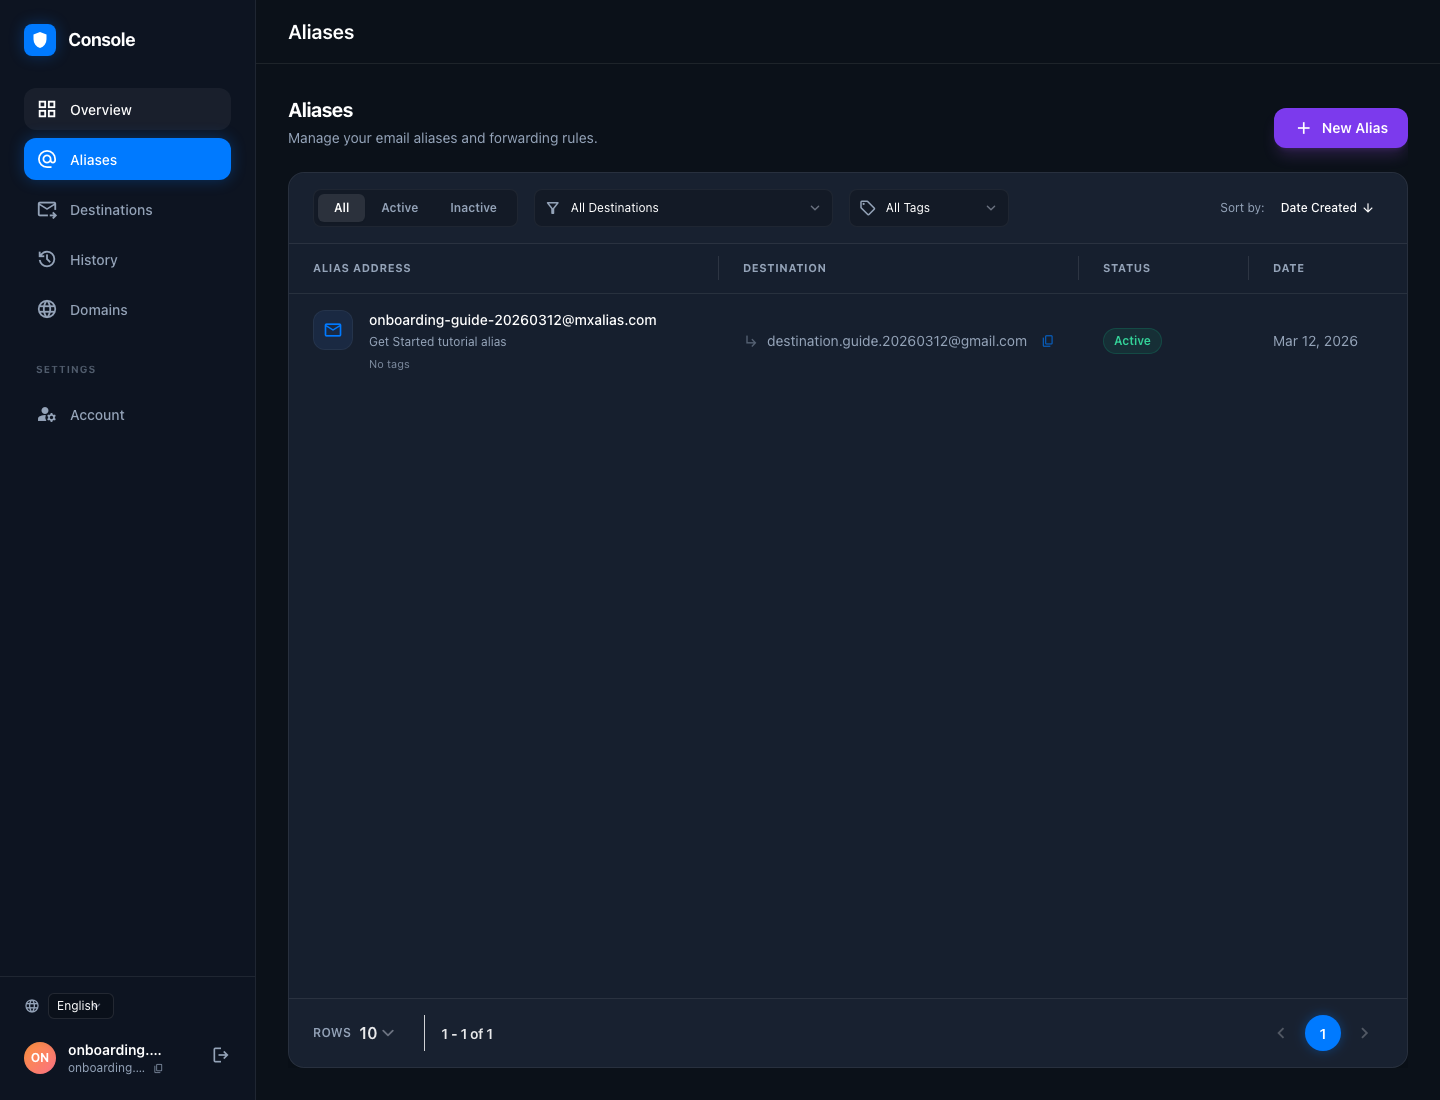
4. Create the first alias you will actually use
Head to Aliases, choose New Alias, and start with a name that makes sense when you see it again a month from now. In our walkthrough, we used onboarding-guide-20260312@mxalias.com and routed it to the destination inbox we had just confirmed.
5. Test and manage it
Once the alias exists, send it a quick test message. If it arrives where you expect, you are set. From there, the day-to-day workflow is simple:
- copy the alias for signups and product trials
- disable the alias if it starts receiving spam
- review traffic in
History - move to
Custom domainswhen you want branded addresses